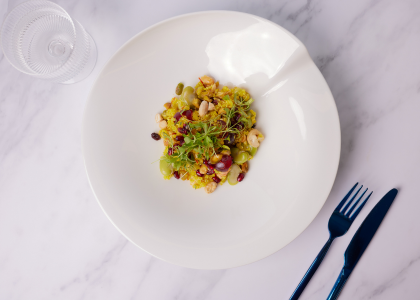
A plant-based recipe to celebrate great chefs around the world
This International Chef's Day, we're raising a fork to the hard-working and passionate chefs across the world, including Le Cordon Bleu chefs in training, ...

Are you shooting for an advertisement, an editorial food magazine, a website, a cookbook spread, a restaurant menu, or your personal food blog? Is the objective to sell a product, display a lifestyle, or gain influence on social media? Understanding your customer is the starting point for your food photography. Creative and technical decisions will flow from here.
Australia-based food photographer Nelly Le Comte swears by the power of forethought, “I can’t say it often enough, the more planning and preparation goes into your photography, the easier the post-production will be!” she stresses. Creating a mood board that collates all the important ideas relating to the shoot, including colour scheme, use of props and type of lighting will bring in some method to the madness.
Most great food photos follow the rule of thirds, placing essential elements off-centre makes for a more striking composition. Flout it when you need to — by zooming into a slice of kiwi to show off its vibrant seed patterns, for example. Change your viewpoint to suit the subject. A tilted 45-degree angle would do justice to the beauty of a piled-high layer cake, while an overhead shot would work wonders for a cheese-smothered pizza crammed with toppings.
Is your shoot minimalistic or prop-based? Are you using characterful chipped ceramic plates or fine china? Do misshapen heirloom carrots figure as background elements? Arranging the food for the shoot through carefully sourced props like plates, bowls, ramekins, cutlery, napkins, wooden boards and the like plays a key role in transforming a meal into a work of art. Even if you are collaborating with a professional food stylist, it pays to hone your aesthetic sense.
Preparing food for a shoot needs as much skill as selecting props and photography. Most people want to see honest food photographs. However, a dish that looks good enough to serve is not always photogenic enough to shoot. Assembling the perfectly juicy burger or a dewy fresh Romaine lettuce salad requires getting some ‘faking’ tricks up your sleeve. If you want to succeed you need to acquire these skills.

A simple shot lit perfectly from every direction, is often the best way to shoot food. Soft, diffuse natural light is preferred by most photographers as it catches the smallest detail, highlights the natural texture of food and imparts delicacy to the image. However, abundant natural light isn’t always viable. Studio lights can replicate the effect of natural light. Besides, the use of dramatic artificial light can lend atmosphere and artistry to a shoot. Learn to manipulate light. The more you play, the more ‘enlightened’ you’ll be.
“Food is good. Food with a story is better. Food with a story you’ve never heard of is best of all, and food with a story you’ve never heard of but that you can relate to is the Holy Grail,” noted American culinary expert Andrew Zimmern in a recent interview with Food and Wine magazine. He could not have put it better. As the perception of food goes beyond being merely delicious, viewers want to see more photos that show the big picture — where the dish came from, who made it, and how. Weave a strong narrative with your images.
Beginners, are you using your DSLR in auto mode? Do not let your camera control you! Switching to manual mode will enable you to strike the right balance between aperture, shutter speed and ISO to work out the perfect exposure recipe for your shoot. Evaluating your lens options is just as important.
Cropping and retouching photos using software like Photoshop or Lightroom is the final step towards unlocking the drool-quotient of your image. An unedited RAW image from the camera could lack brightness, need colour correction, or cry out for some pizzazz. Often, a few simple post-production steps will get you there.
Any professional food photographer will advise this. As the smallest camera shake shows up in high-quality photographs, tripod is essential helping to keep your subject in focus. Also, worth considering getting a bounce card to reflect light back onto the subject, though more inexpensive DIY reflectors work just as well.
Ultimately, a great photograph comes from trusting your intuition. Channel your instincts to choose, frame and shoot your food, and you will have your audience eating out of your hands. Photos at the top of the page: by Nelly Le Comte nellylecomtephotography.com.au
Copyright © 2025 Le Cordon Bleu International B.V. All Rights Reserved.