-
Locations
Campuses in Europe & Middle EastCampuses in The AmericasCampuses in AsiaLe Cordon Bleu International
- Online Learning
Contact your local representative - Our Story
- Programmes
- Brochures
- News & Events
- Contact
- Find Course

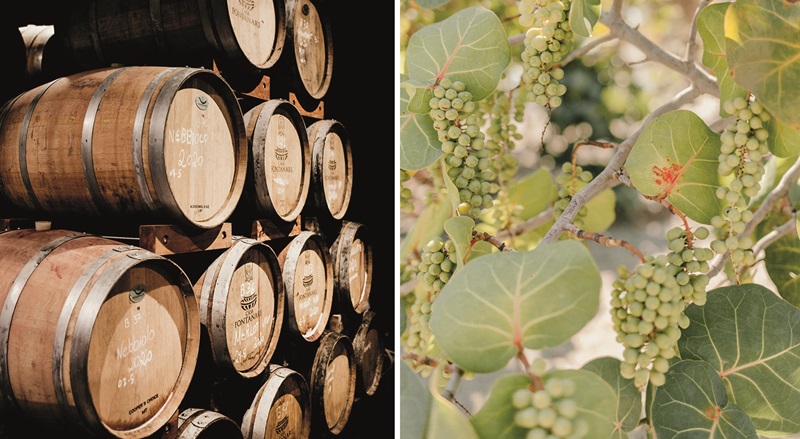
From the vine to the bottle, you can learn how to make wine!
The winemaking process may seem intimidating at first, but there are just several steps to follow to make wine. Together, we are going to explain certain steps such as maceration, fermentation and racking etc. How do you make wine in 7 steps?
The choice of grapes is key to the quality of wine. They are the raw material that will give the beverage personality and character. To obtain quality ripe grapes, several factors need to be considered:
One of the first things you will need is a "fermentation vat". This is a glass or plastic food container for holding the must (the mixture of grape juice, pulp and skins).
For practical reasons, choose a container with a volume slightly greater than the quantity of must you intend to ferment, to avoid overflowing during fermentation.
At the top of the fermentation vat an air cap will be added, this allows carbon dioxide to escape during fermentation while preventing oxygen from entering. Oxygen can alter the taste of the wine.
You will also need measuring instruments, starting with the mustimeter: This tool allows you to measure the sugar content of the must and monitor the progress of fermentation. The thermometer checks the temperature of the fermentation. Too low a temperature can slow down the process, while too high a temperature can cause defects in your wine.
At the end of the process, you will need a siphon to transfer the clear wine to another container. Without it, you won't be able to rack and bottle the wine. At this stage, you will need glass demijohns fitted with hermetic stoppers
The winemaking process begins with crushing and/or pressing the grapes. This stage extracts the juice from the skins and pulp and is known as crushing. For small quantities, you can use a manual grape crusher. For larger volumes, a manual or electric press is recommended. Be careful not to crush the pips, as they can give wine a bitter taste.
For red wines, most professionals recommend destemming the grapes, i.e. separating the grapes from the stalk (the woody part of the grape). This minimises bitterness and coarse tannins in the wine.
For red wines, the skins are kept with the juice.
For white wines, only the pressed juice is kept.
The amount of juice obtained depends on the grape variety, the ripeness of the grapes and the pressure applied. On average, 60-70% juice is obtained from grapes.
Fermentation is the heart of the winemaking process. Yeasts play a major role in transforming sugars into alcohol and have a considerable influence on the aromatic profile of wine. Choose a yeast that is suited to the type of wine you want to produce (red, white, dry, sweet, etc.). As far as temperature is concerned, maintain a stable level of fermentation (between 18 and 25 degrees depending on the yeast chosen).
Primary fermentation is the most active phase, during which the yeasts consume the sugars in the must and produce carbon dioxide. This stage lasts between a few days and several weeks. This is when you use the mustimeter to monitor the progress of fermentation. The density of the must gradually decreases as the sugars are transformed into alcohol.
For red wines, gentle daily stirring during primary fermentation can help extract more colour and tannins from the grape skins.
Once primary fermentation is complete, it is time to separate the clear wine from the lees at the bottom of the tank and the grape skins at the top (for reds).
The first racking then takes place, which involves siphoning off the clear wine into another clean container, leaving the lees and skins at the bottom of the fermentation tank.
The aim of clarification is to eliminate, in a second phase, the particles suspended in the wine that can give it a cloudy appearance.
You can use natural clarifying agents such as clay or gelatine.
These substances attract the particles and they fall to the bottom of the container, making it easier to remove them with a second racking.
Ageing allows the wine to develop its complexity and aromas. This step is particularly important for red wines, as they gain in structure and finesse over time.
Transfer the clarified wine into suitable ageing containers (oak barrels, stainless steel casks, glass demijohns, etc.). New oak brings out vanilla notes, while used oak brings out more subtle notes.
As far as ageing is concerned, red wines can mature for several months, or even several years, to develop their structure and aromas. White wines may be ready to drink after just a few months' ageing. Whatever the case, taste it from time to time to determine how it is evolving and decide on the perfect moment to bottle it.
Once the wine has reached its peak, it is time for the bottling stage. This final stage requires precision and good hygiene to guarantee the quality and longevity of the wine. It may seem obvious, but it is always worth remembering: Carefully clean the bottles and glass corks before bottling. You can sterilise them in boiling water for a few minutes or use a disinfectant suitable for food contact.
Then siphon the wine from the ageing container into the bottles, taking care not to stir up the lees that have settled on the bottom. Leave a space of about 2 cm at the top of the bottle neck to allow the wine to expand during storage.
For storage, store wine bottles in a cool, dark place away from vibrations. A cellar is the ideal place for long-term wine storage. The ideal storage temperature is generally between 10 and 15°C. The bottles can then be labelled.The Wine & Management programme leads to a double degree in collaboration with URCA (Université de Reims Champagne-Ardenne). During the programme, you will be taught all aspects of wine production: from viticulture to vinification, and of course marketing. You'll learn how to select the grapes and grape varieties best suited to your production objectives; master alcoholic fermentation techniques; manage a cellar and optimise production conditions; understand the principles of oenology and wine tasting etc. You'll receive comprehensive training from professionals who want nothing more than to share their passion with you!
Copyright © 2026 Le Cordon Bleu International B.V. All Rights Reserved.